Riding puts your eyes through a lot: wind, road grit, changing light, and glare that can leave you squinting and fatigued. The right motorcycle sunglasses (or prescription motorcycle sunglasses) can make riding more comfortable while helping you see hazards clearly.
This guide is for riders buying eyewear online, contact lens wearers who want a better setup for long rides, and anyone who wants to replace scratched sunglass lenses instead of replacing frames. You’ll learn how to choose lens types for glare reduction, pick tints for your riding conditions, and avoid the most common fit and helmet-compatibility mistakes.

Why motorcycle eyewear is different from everyday sunglasses
On a bike, airflow can sneak in from the top, sides, and bottom of a frame, drying out eyes and turning a tiny speck of dust into a big distraction. Better coverage and a stable fit matter as much as the lens color.
Glare is also more intense when you’re surrounded by reflective surfaces like car hoods, windshields, wet pavement, and water. That’s why “good enough” fashion sunglasses often feel uncomfortable on the road even if they look great off the bike.
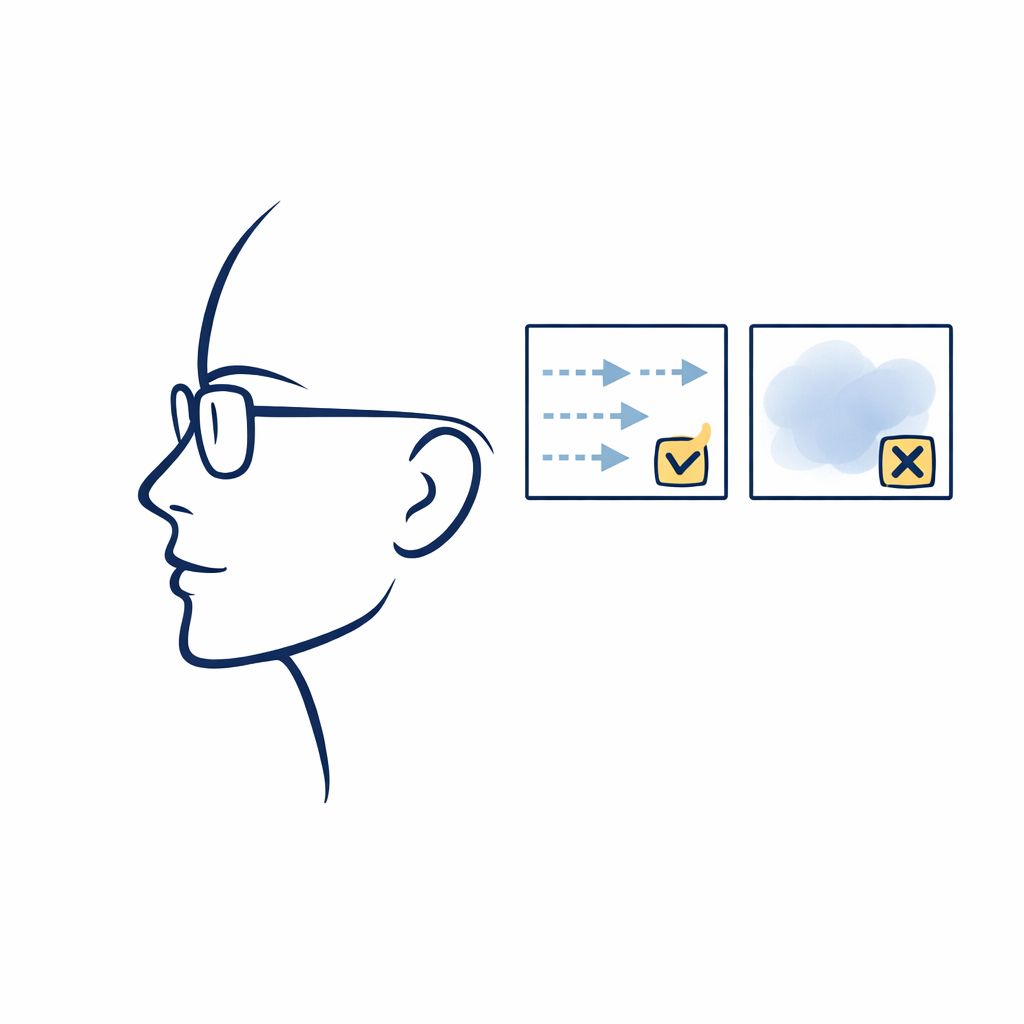
What’s new for riders shopping for sunglasses and lenses
For most riders, the biggest “new” change isn’t a rule, it’s choice. You can now build a practical setup without committing to a single do-it-all lens: a dedicated daylight lens (often polarized), plus a clear or light-tint lens for dawn, dusk, or overcast rides.
It’s also easier to refresh what you already own. If your favorite frames still fit perfectly under your helmet, replacing the lenses can be the fastest path to sharper vision and better comfort without relearning a new fit.
Step 1: Start with coverage and wind protection
When riders say they need “wind protection eyewear,” they’re usually describing two things: how much of the eye area the frame covers, and how well it seals against stray airflow. This is where wraparound sunglasses, sport frames, and motorcycle goggles shine.
Look for a shape that follows your face and sits close enough to reduce gaps, especially at the outer corners. If you ride behind a short windshield or on a naked bike, prioritize side coverage even more.
Wraparound sunglasses vs. motorcycle goggles
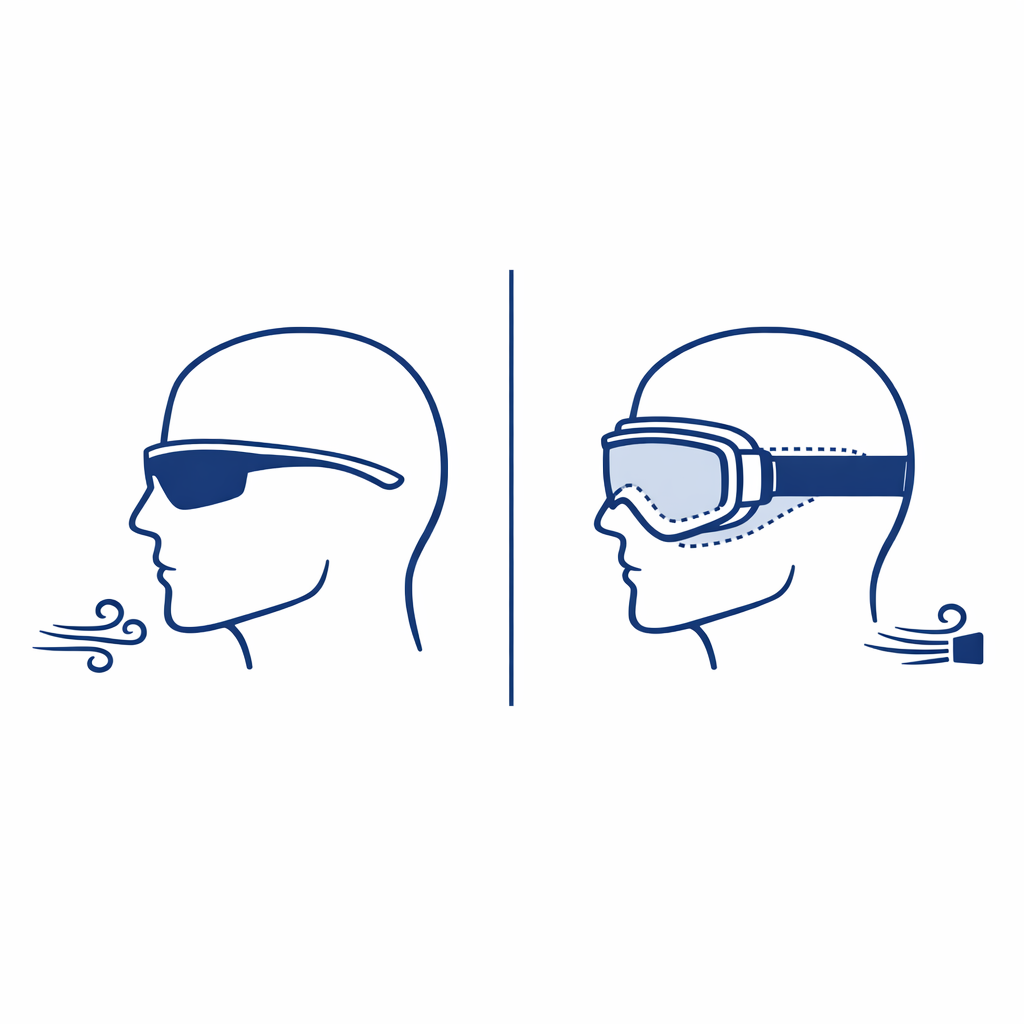
Wraparound sunglasses are popular because they can fit under many helmets and give wide peripheral coverage. Goggles typically seal better against wind and dust, but they add bulk and can be harder to fit with some helmet openings.
If you hate watery eyes on the highway, consider a frame designed for sport use, or a goggle-style option. The best choice is the one you’ll actually wear every ride.
Step 2: Choose lens materials with real road durability

Motorcycle riding is not the time for fragile lenses. In the U.S., prescription lenses sold for dress or sunglass wear must meet the FDA impact-resistance requirement for prescription lenses, but that does not automatically mean every pair is “safety-rated” for high-impact environments.
If you want more peace of mind, consider eyewear designed for protective use, especially if you often ride with your helmet shield open. OSHA’s eye-and-face protection guidance discusses how protective eyewear is commonly evaluated against standards like ANSI/ISEA Z87.1 in workplace settings, which can be a helpful benchmark when you’re comparing options.
Material-wise, many riders choose lightweight, impact-resistant options used in protective eyewear. The American Academy of Ophthalmology notes that polycarbonate is commonly used for protective eyewear because of its impact resistance, which is one reason it’s so popular for sports and active use.
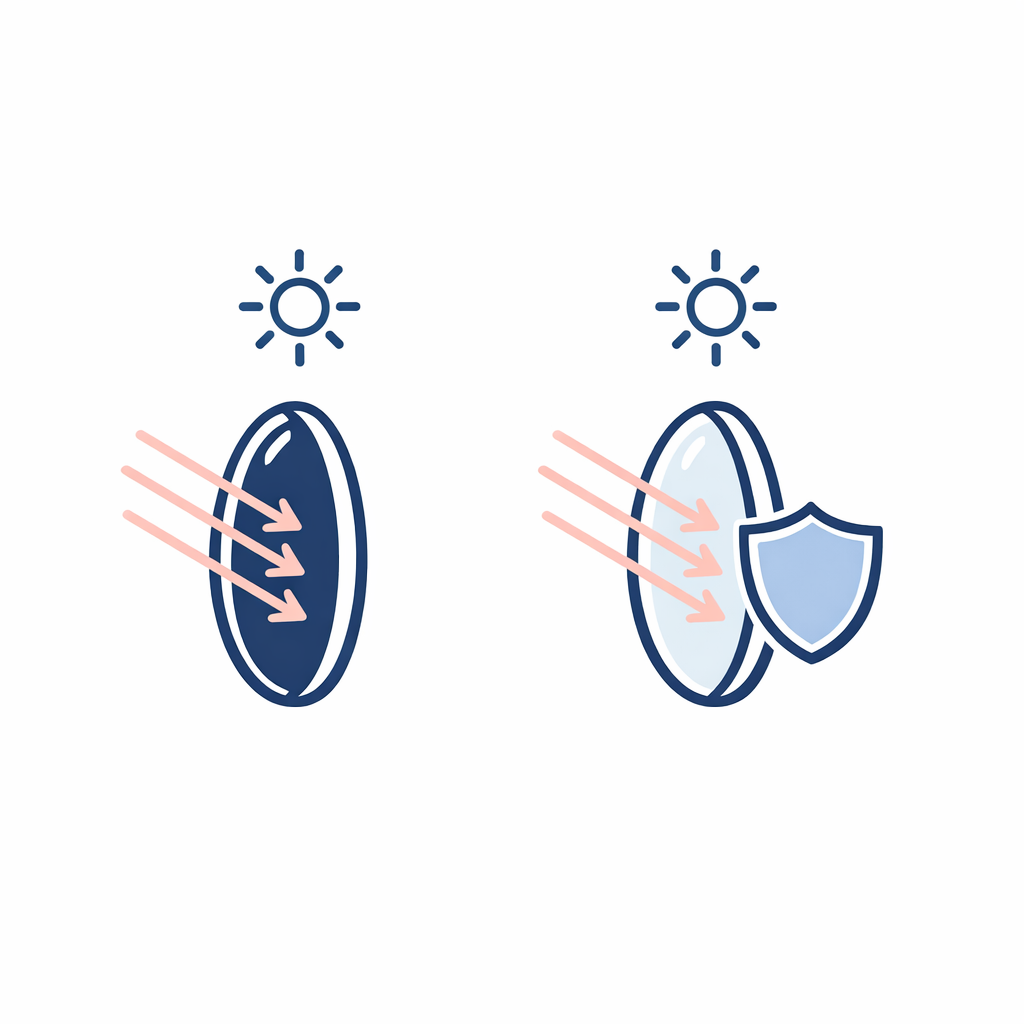
Step 3: Polarized vs. non-polarized for glare reduction
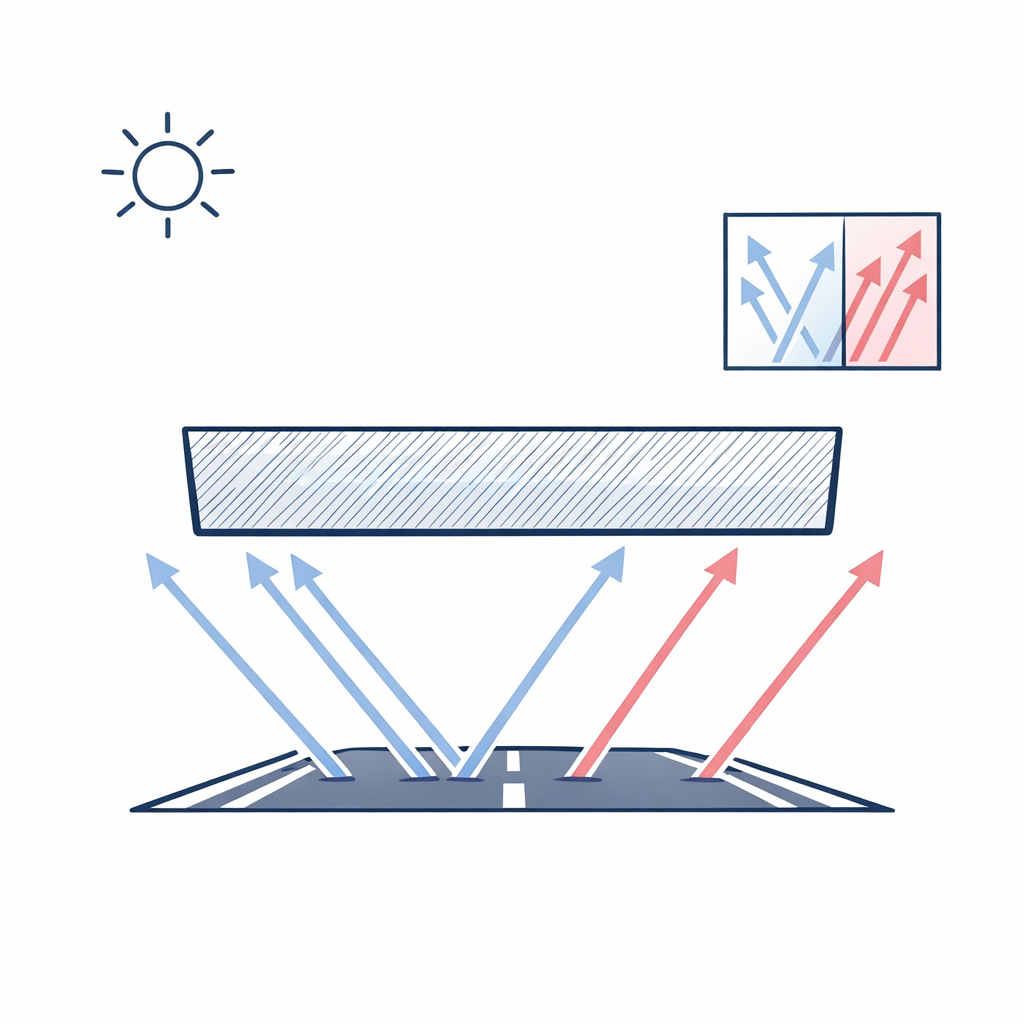
If “glare reduction riding sunglasses” is your top priority, polarized lenses are often the first feature to consider. The American Academy of Ophthalmology explains that polarized lenses reduce glare from reflective surfaces, which can help you feel less visually stressed on bright rides.
That said, polarized is not automatically “best” for every rider. The same American Academy of Ophthalmology guidance notes that polarization can make some digital displays harder to see at certain angles, which may matter if your bike has an LCD dash or you rely on a phone/GPS mount.
A practical approach is to decide where you struggle most:
- High sun + reflective roads or water nearby: Polarized lenses are often a strong choice.
- Lots of screen-checking: Consider testing polarized first, or choose a high-quality non-polarized lens with a tint you like.
- Mixed conditions: Consider two lenses (polarized for daytime, clear/light for low light).
Step 4: Tint, VLT, and choosing lenses for changing light

Tint is not just “style.” It changes contrast and comfort, and it can affect how confident you feel scanning the road. Many riders use a simple rule: go darker for bright sun, and go lighter as your riding shifts toward shade, clouds, or evening.
You’ll often see “VLT” when shopping for motorcycle sunglasses. VLT stands for “visible light transmission,” meaning the percentage of visible light that passes through a lens; lower VLT looks darker, higher VLT looks lighter.
Here’s a rider-friendly way to think about common options:
- Gray/neutral: A popular all-around tint for daylight because it keeps colors looking natural.
- Brown/amber: Often chosen for boosting contrast, especially on partly cloudy days.
- Yellow/light-contrast tints: Sometimes used in flat light, but avoid anything that feels too dark if you ride near dusk.
- Clear: Best when you’ll be out late, riding in heavy shade, or dealing with frequent light transitions.
UV protection: don’t judge it by darkness
Dark lenses are not automatically safer. The American Academy of Ophthalmology emphasizes that UV protection should be based on UV-blocking capability, not how dark the lens looks, which is why UV labeling matters even for lighter tints.
If you’re comparing two pairs, prioritize verified UV protection first, then decide tint and polarization based on comfort and your typical riding light.
Photochromic lenses for riders who hate swapping eyewear
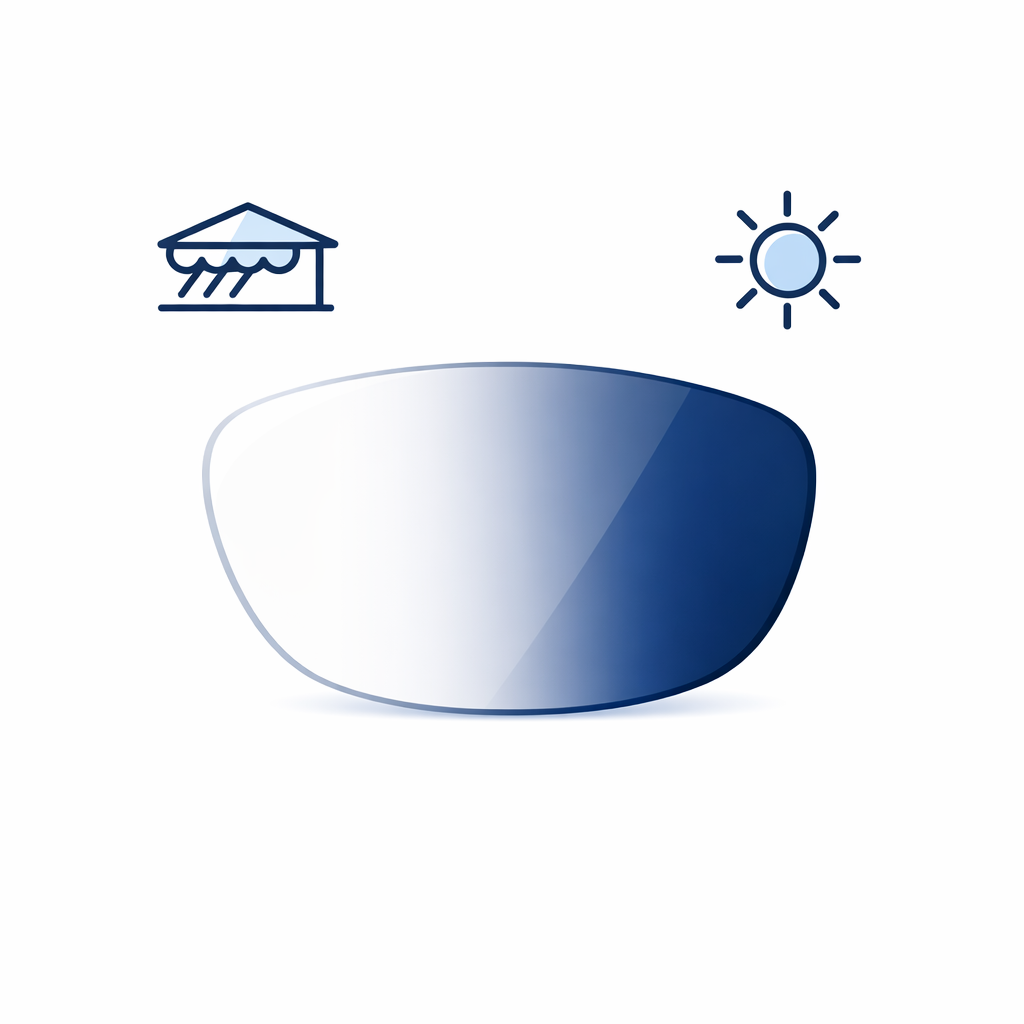
Photochromic lenses are designed to change tint with UV exposure, which can be appealing if your rides include sun, shade, and quick stops. The American Academy of Ophthalmology explains that photochromic lenses darken in sunlight and become clearer indoors, which can reduce the need to carry multiple pairs.
For motorcycle use, think of photochromic as a convenience feature, not a magic solution. If you often ride at night, you may still want a dedicated clear option so you’re never tempted to “make do” with a lens that feels even slightly too dark.
Step 5: Prescription motorcycle sunglasses (and other vision setups)
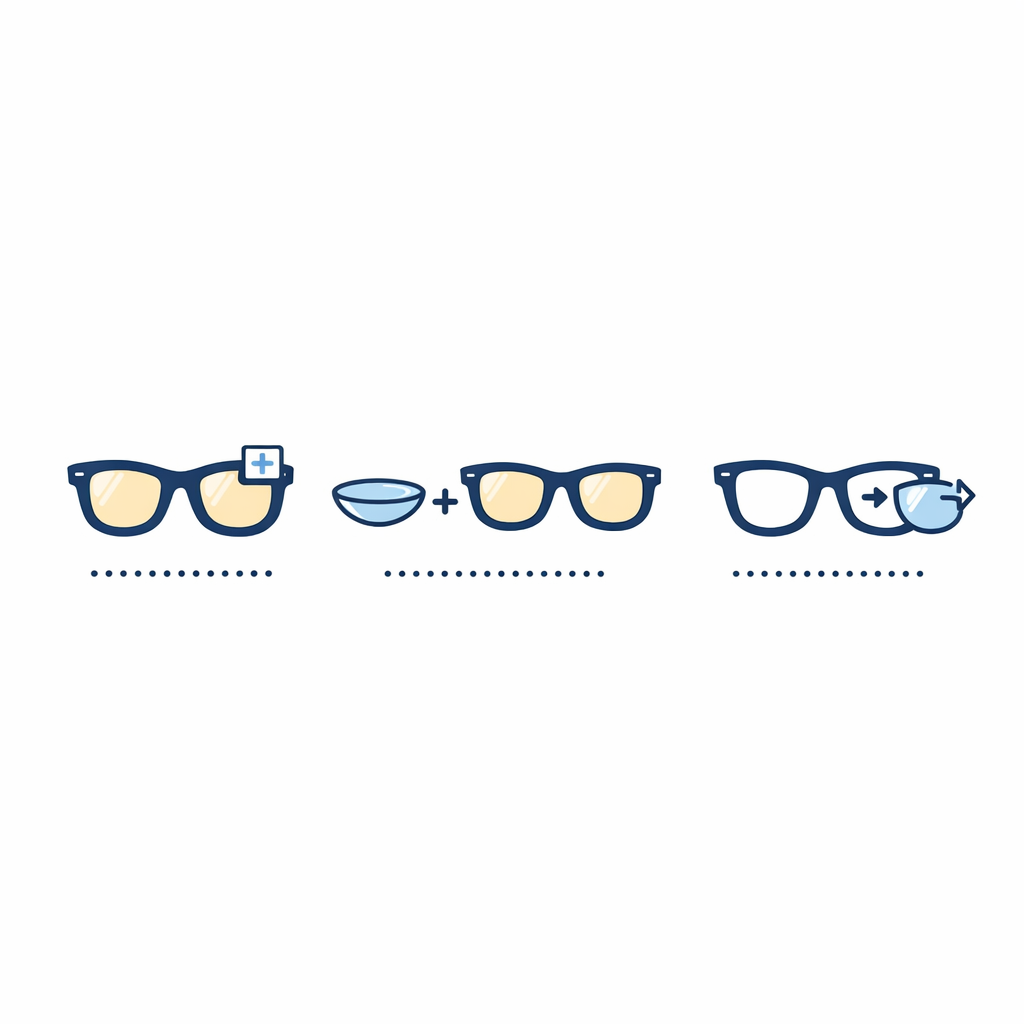
“Prescription motorcycle sunglasses” can mean a few different setups, and the best one depends on your helmet, your prescription, and how long you ride. If you’re shopping online, it helps to decide which category you’re aiming for before you start comparing lens add-ons.
Option A: Dedicated prescription sunglasses
This is the cleanest setup for many riders: one pair that corrects your vision and manages sun and glare. If glare is a major issue for you, you can pair prescription with polarization and a tint that matches your riding hours.
When choosing frames for a helmet, avoid bulky temple arms that create pressure points. A slightly sportier shape often stays stable at speed and helps with peripheral coverage.
Option B: Contacts + non-prescription riding sunglasses
Many riders like contacts because you can wear any frame you want over them, including highly wrapped sport sunglasses. If your eyes feel dry on rides, a more wind-blocking frame can make contacts more comfortable without changing brands immediately.
This setup also makes it easier to carry a spare clear lens option. If you’re a frequent traveler or commuter, that flexibility can be a big win.
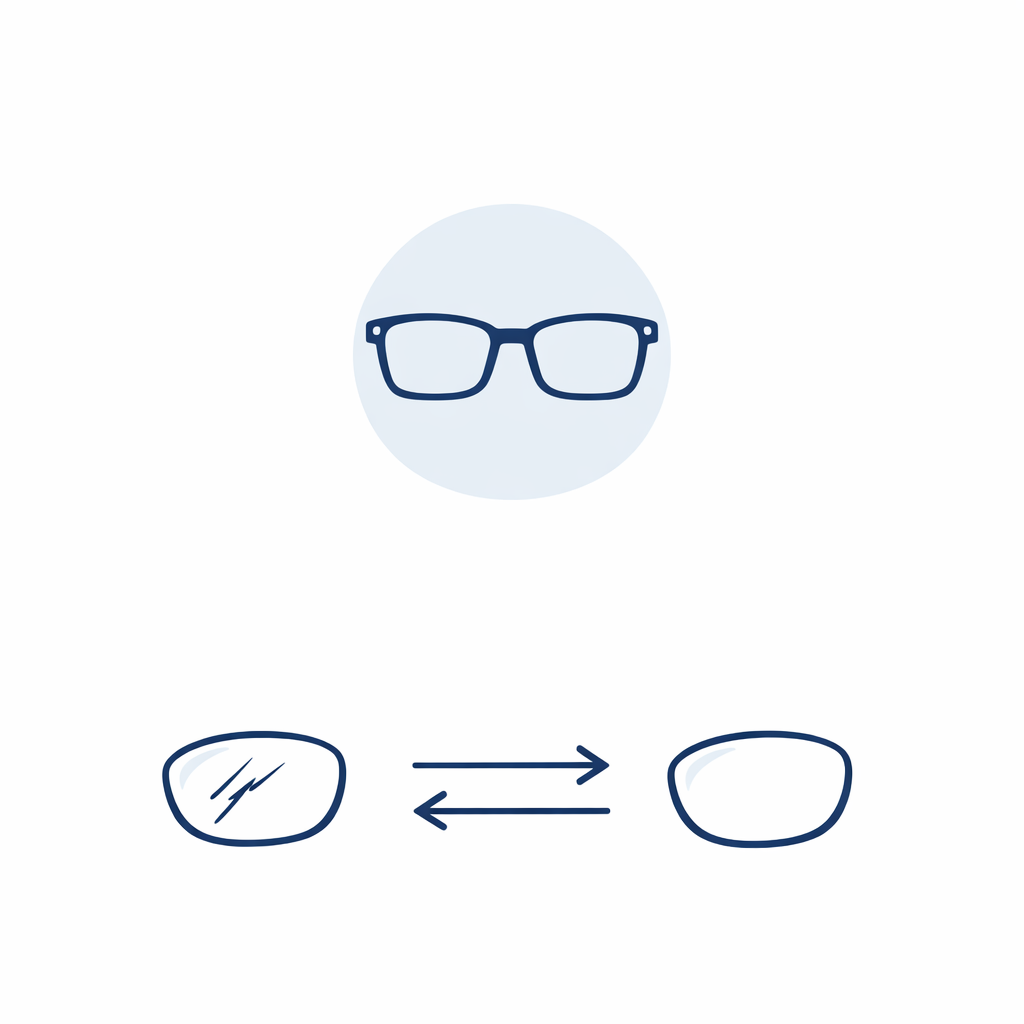
Option C: Keep the frames, replace the lenses
If you already love the way your frames fit your helmet, lens replacement is often the smartest upgrade. Scratches, worn coatings, and outdated prescriptions can all make glare feel worse, even if the frame is perfect.
LensDirect supports riders who want to refresh their eyewear with prescription lens replacement options, including a send-it-in service and a DIY-style ordering path for compatible frames.
Step 6: Helmet compatibility and all-day comfort checks
Even the best lenses won’t help if the frame hurts after 20 minutes. Motorcycle comfort is mostly about pressure management (temples and ears) and stability (no slipping when you turn your head).
Use these quick fit checks before you commit:
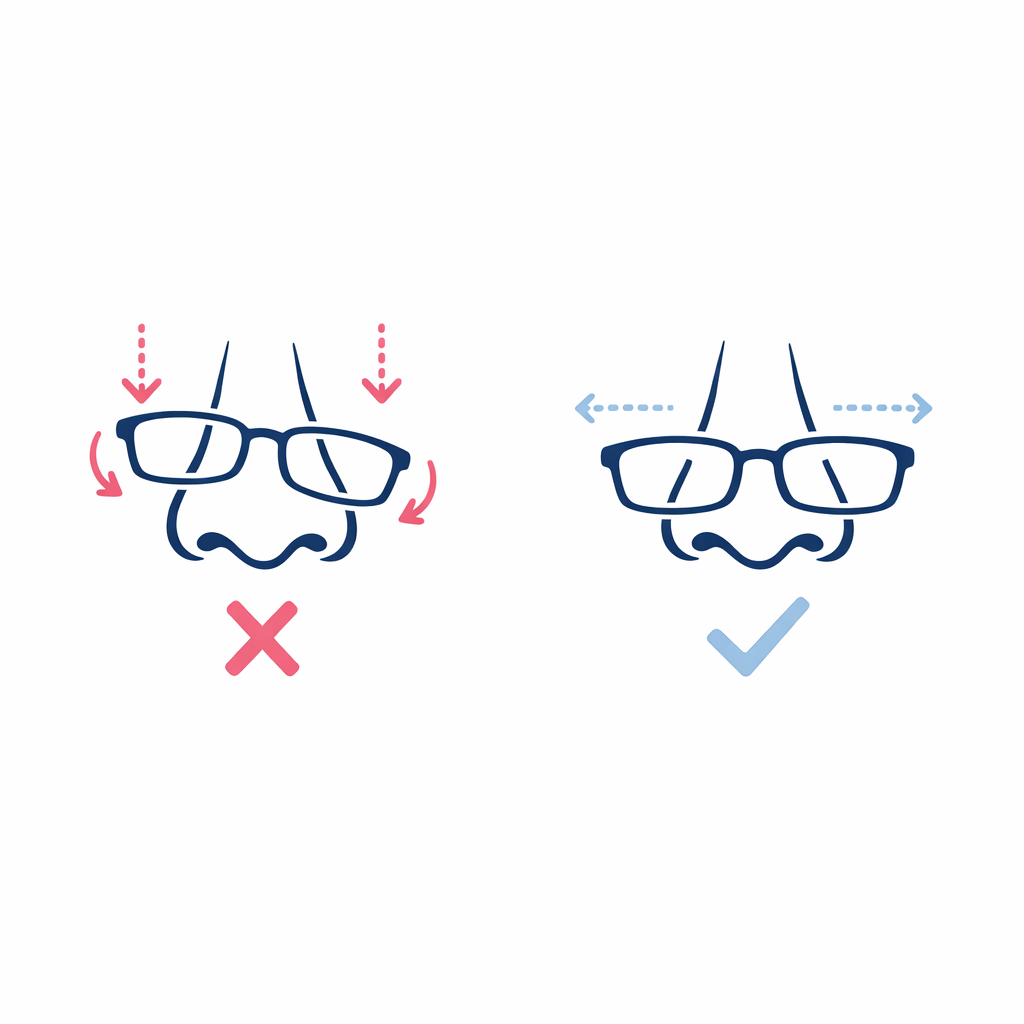
- Temple arms: Look for slimmer arms that won’t dig in under helmet padding.
- Nose fit: The frame should stay put when you look down; slipping usually becomes worse with sweat.
- Coverage: Check for gaps at the outer corners where airflow can rush in.
- Fog tendency: If you fog easily, prioritize better airflow management (and consider using your helmet vents effectively).
If you’re unsure what frame shapes tend to complement your features (and give you good coverage), LensDirect’s fit guide can help you narrow down styles before you start fine-tuning lens choices.
Common mistakes and misconceptions
Mistake: “Darker lenses mean better UV protection”
Lens darkness and UV blocking are different things. The American Academy of Ophthalmology notes that UV protection depends on the lens’s UV-blocking properties, not the tint depth, so always check UV labeling when you shop.
Mistake: “Polarized is always best for motorcycles”
Polarized lenses can be excellent for glare, but they can also create readability issues with certain screens. The American Academy of Ophthalmology explains that polarization may affect how some digital displays appear, so it’s worth considering your dash and device setup.
Mistake: “Any prescription lens is ‘safety rated’”
In the U.S., prescription lenses must meet baseline impact-resistance rules under the FDA regulation for impact-resistant lenses, but protective “safety eyewear” is a separate category with its own markings and testing expectations.
Mistake: Buying first, then realizing you don’t have the measurements
Ordering the right prescription motorcycle eyewear online is much easier when you have your pupillary distance (PD) ready. If you don’t have it on your prescription, LensDirect’s PD measurement guide walks you through simple ways to measure at home.
What to do next: a practical buying checklist
- Decide your setup: Prescription sunglasses, contacts + sunglasses, or lens replacement in your existing frame.
- Prioritize coverage: Choose wraparound or sport coverage if wind and tearing are your main issues.
- Pick glare control: Choose polarized if reflected glare is your biggest problem, but consider your dash/screens.
- Match tint to ride times: Don’t over-darken if you ride in shade, clouds, or toward evening.
- Confirm UV protection: Use labeling, not lens darkness, as your guide.
- Check helmet comfort: Slimmer temples and stable nose fit matter more than most shoppers expect.
- Get your numbers: Have your prescription and PD ready before you order.
Get riding-ready eyewear and refresh what you already own
If you’re ready to build a better riding setup, start with what you actually need most: clearer vision, less glare, and less wind irritation. You can browse everyday and sport-ready options in LensDirect’s sunglasses selection or, if you’re due for an updated prescription, explore eyeglasses that work well under a helmet.
If your frames fit perfectly but the lenses are scratched, outdated, or no longer comfortable, replace your lenses instead of starting over. You can choose full-service lens replacement (send your frames in) or order replacement lenses with the DIY option if you prefer a faster at-home route.
For riders who split time between glasses and contacts, you can also shop contact lenses for travel-friendly backups. And if you want to understand potential savings, learn how to get reimbursed by your insurance before you place a larger order.
Author
Subscribe to our email newsletter to get the latest posts delivered right to your email.