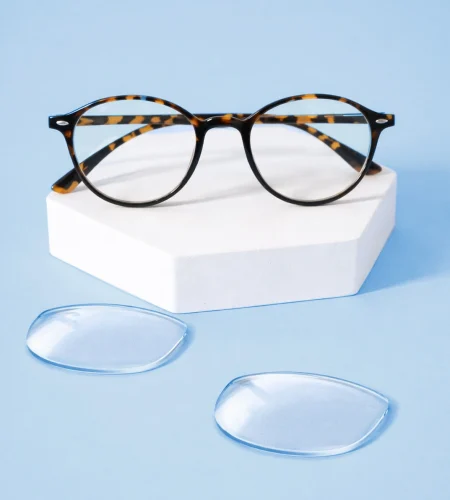
Replacing lenses in frames you already love can be one of the simplest ways to refresh your look, upgrade your vision, or add sun protection without starting from scratch. But “can I replace lenses in my frames?” depends on one thing first: frame eligibility for lens replacement.
This guide is for online eyewear shoppers who want value and convenience, people updating old prescriptions, contacts wearers building a reliable backup pair, and anyone considering rimless lens replacement, semi-rimless lens replacement, or sport sunglasses upgrades. You’ll learn how to spot compatibility issues early, what to photograph or measure before you order, and when it’s smarter (and safer) to replace the frame instead.
Why frame eligibility matters (and why it saves time)
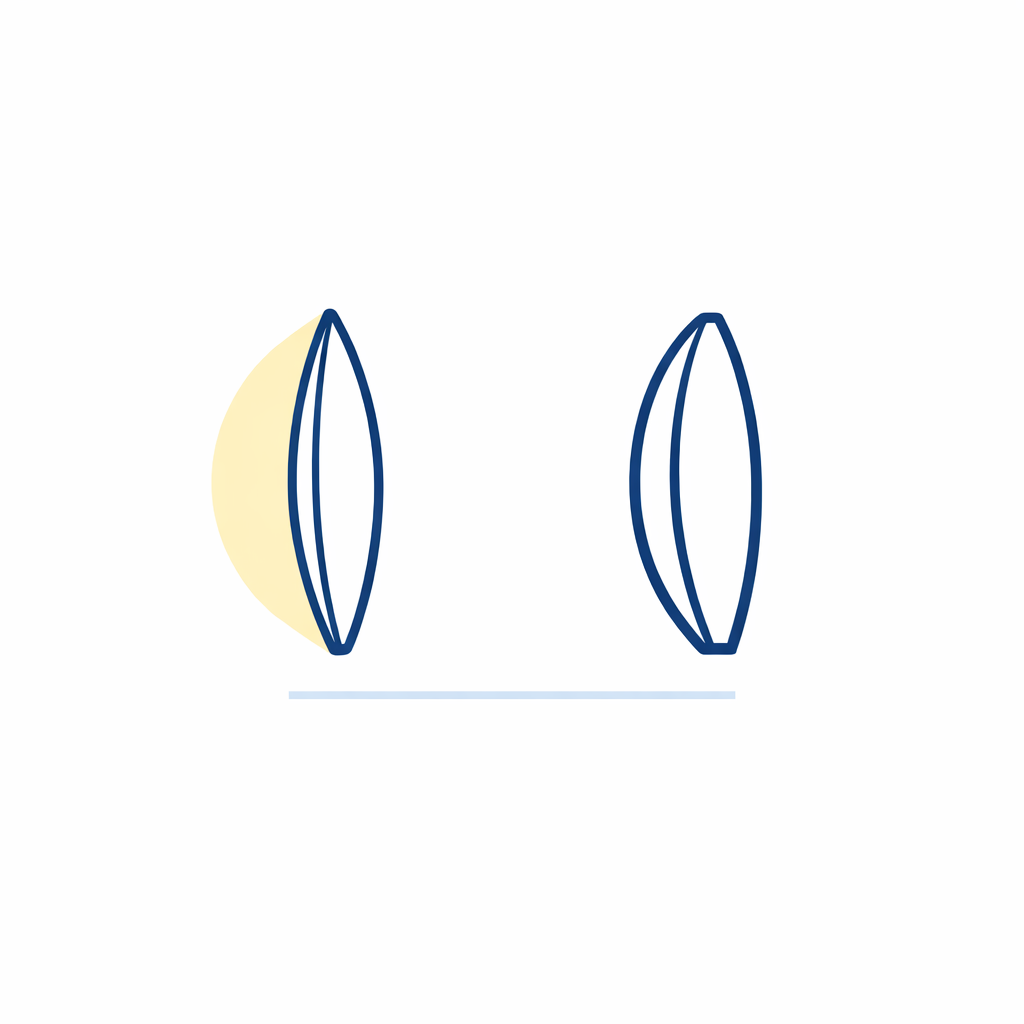
Lens replacement compatibility is mostly about whether your frame can hold a newly cut lens securely and comfortably. If the frame is out of shape, cracked, or missing key parts, new lenses may not seat correctly or may pop out later.
A quick pre-check helps you avoid delays, remakes, or paying for lenses that can’t be safely installed. It also helps you choose lens options that match your frame style, like progressives, photochromic (transition-style) lenses, or a polarized sunglass upgrade.
What changed recently (and why it helps online shoppers)
Buying eyewear online is easier when you have your prescription in hand. The Federal Trade Commission updated the federal Eyeglass Rule in 2020 to strengthen how consumers receive their prescriptions, including adding a required confirmation of prescription release (so you can shop wherever you want). Those changes are summarized in the FTC’s final amendments to the Eyeglass Rule.
Under the federal Ophthalmic Practice Rules (Eyeglass Rule), prescribers generally must provide a copy of your eyeglass prescription after a refraction, even if you do not buy glasses from them. That means getting new lenses for old frames is often a “paperwork-ready” project, as long as your frame itself is a good candidate.
Quick checklist: frame eligibility for lens replacement
Use this as a fast screen before you order. If you can confidently answer “yes” to most items, replacing lenses in existing frames is usually straightforward. If several answers are “no” or “not sure,” plan on a backup option (like picking a new frame) to avoid downtime.
1) The frame is structurally sound
Start with the basics: does the frame still behave like a frame? If it is cracked, overly bent, or missing hardware, it may not be a safe candidate for new lenses.
- Hinges feel tight and stable: No wobble when you open and close the temples.
- Bridge area is intact: No cracks at the nose bridge or at the corners where the lens meets the bridge.
- No visible fractures near the lens edge: Tiny cracks around the eyewire (the rim that holds the lens) can spread during lens removal or installation.
- Screws and end pieces look healthy: Stripped screws or loose end pieces can make the fit unreliable.
If the frame already feels fragile, “damaged frames lens replacement” can become a gamble. In that scenario, it is often better to use the prescription to start fresh with a new pair and keep your current frame as an emergency backup.
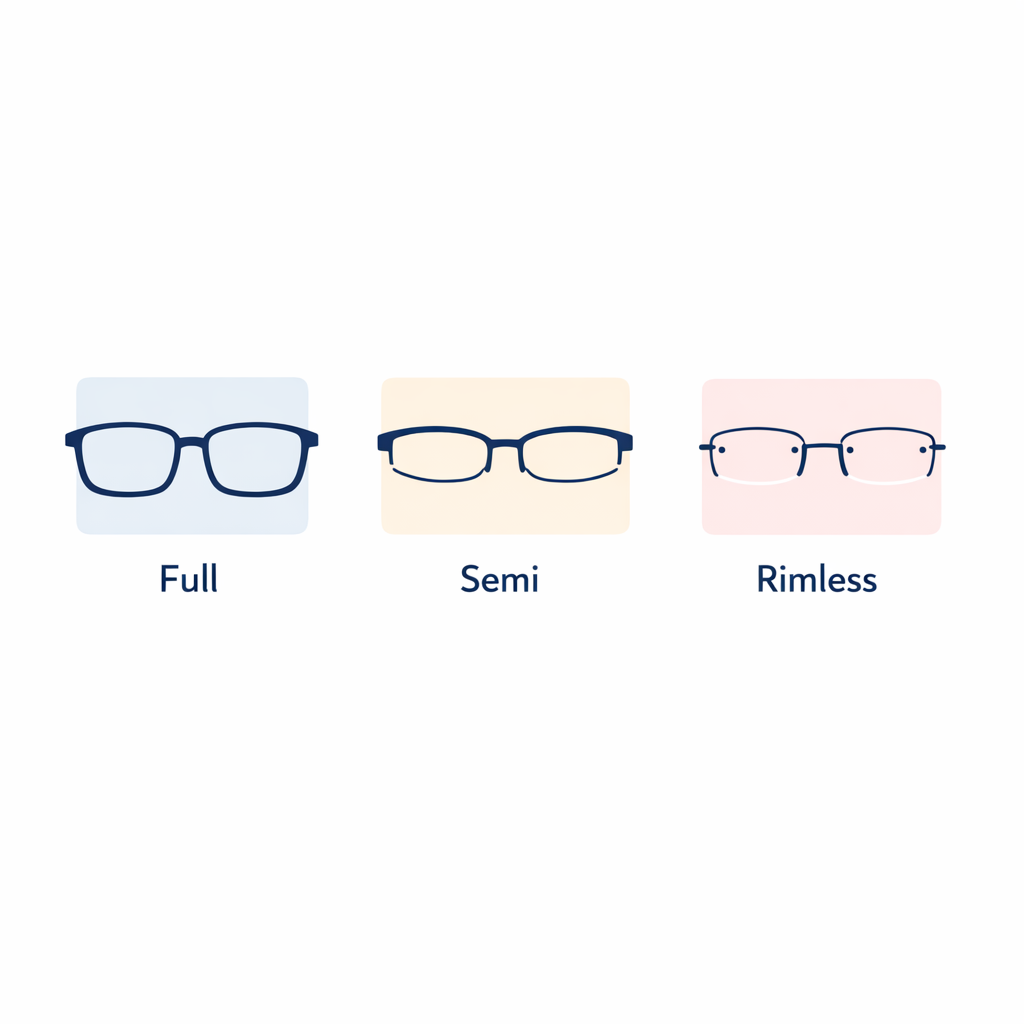
2) You know what frame type you have (full-rim, semi-rimless, rimless)
Frame type changes how lenses are mounted. This is the single biggest factor behind “can you put new lenses into old frames?” because different mount styles require different cuts, grooves, or drilling.
- Full-rim: The lens is held by a continuous rim. These are typically the easiest for lens replacement compatibility.
- Semi-rimless: Part of the lens is held by the frame, and part is supported by a tensioned cord. Semi-rimless lens replacement can work well, but the cord and groove condition matters.
- Rimless: The lenses are part of the structure, attached by screws or compression mounts. Rimless lens replacement is very doable when hardware is intact, but it needs precise hole placement and careful handling.
If you are unsure, flip your glasses in your hand and look at the bottom edge of each lens. If you see a thin cord or a “floating” edge, treat it as semi-rimless. If the lens has mounting hardware passing through it, treat it as rimless.
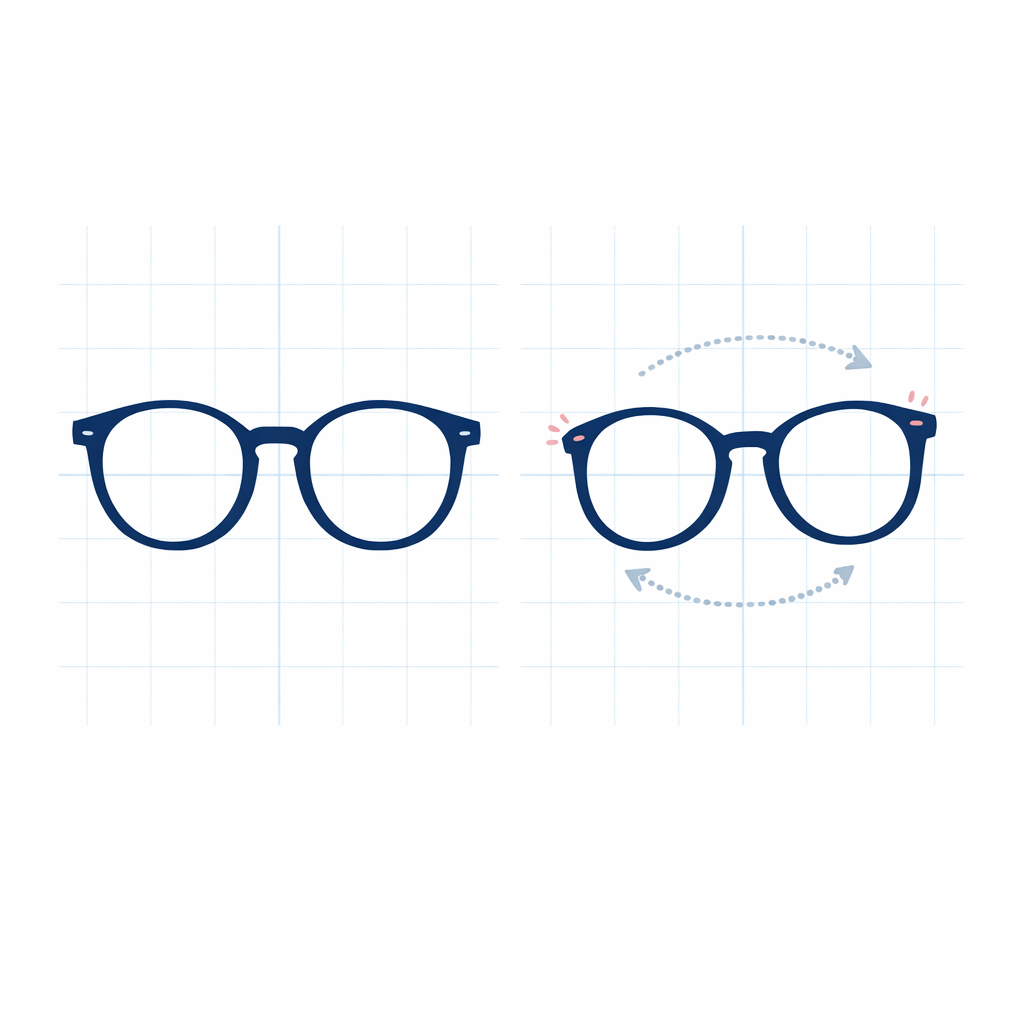
3) The frame still fits your face the way you want
Replacing lenses in your own frames makes the most sense when you genuinely like the fit. If the frame slides down, pinches, or sits crooked, new lenses will not fix that underlying comfort problem.
- It sits level: The top line of the frame looks even across your brows.
- It is comfortable at the nose and ears: No persistent red marks or headaches that suggest the frame shape is wrong for you.
- It is not constantly loosening: Repeated loosening can signal worn hinges or stretched material.
If the fit is “almost right,” consider getting a professional adjustment before ordering. A small alignment change can make progressive lenses feel more natural and reduce the risk of visual discomfort.
4) The lens opening is not warped or out of shape
For lens replacement, the lab needs a stable shape to cut and edge the new lenses to match your frame. If the frame front is twisted or flattened (common after being sat on), the lens cut that fit yesterday may not fit today.
- Look straight-on: Are both lens openings symmetrical, or does one side look stretched?
- Check for stress whitening: Some plastics show pale stress marks near the rim when they have been over-bent.
- Press gently: If the rim flexes too easily or feels brittle, treat the frame as higher risk.
If your frame looks “shapeshifted,” it can still be possible to replace lenses, but it often becomes a judgment call after an inspection. If you need glasses urgently, it may be smarter to order a second pair rather than betting everything on a questionable frame.
5) The frame can support your prescription and lens goals
“New prescription lenses in old frames” is usually simple for mild-to-moderate prescriptions, but higher prescriptions can raise thickness and weight considerations. That does not mean you cannot replace lenses in existing frames, only that lens options matter more.
- If your prescription is strong: Consider thinner materials (often called “high-index”) to reduce edge thickness and weight.
- If you want sunglasses: Confirm the frame shape and curve match how you plan to use them (driving glare vs. sport wrap vs. everyday).
- If you want progressives: Make sure the frame has enough vertical height so the viewing zones are comfortable.
A practical rule: if your current lenses are already very thick at the edges (or feel heavy), assume you will want to discuss thickness-reduction options before you hit “order.”
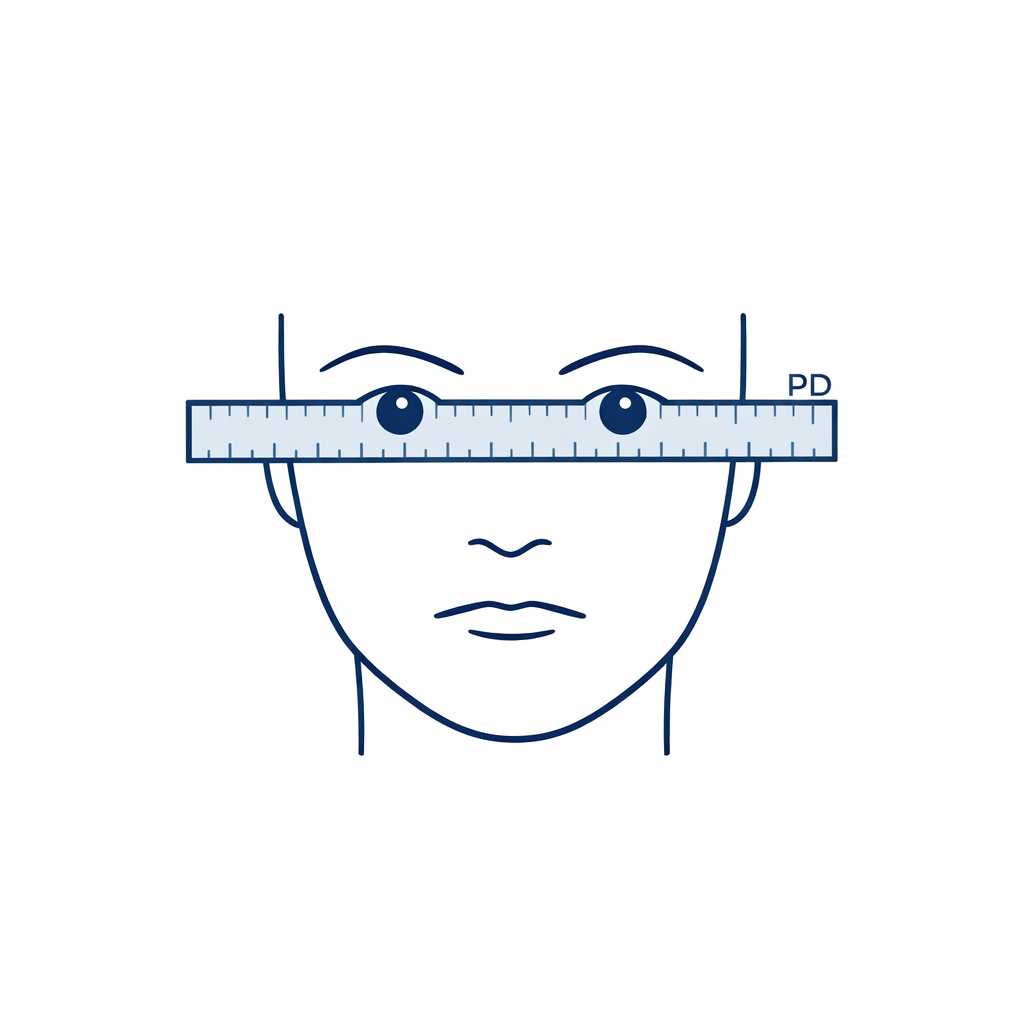
6) You can provide the right order details (prescription, PD, and preferences)
To order lenses for existing frames, you typically need your prescription and a few measurements. The federal Eyeglass Rule defines what is included in an eyeglass prescription and supports your ability to take that prescription elsewhere, but some shopper-needed measurements may not be part of the prescription itself.
- Your current eyeglass prescription: Especially important if you are changing lens type (single-vision to progressives) or adding prism.
- Your pupillary distance (PD): This is the alignment measurement that helps position the optical center for your eyes.
- Your lens preferences: Anti-reflective coating, photochromic, polarized sun lenses, or blue-light filtering based on your daily use.
If anything about your prescription is unusual (like prism, very high astigmatism, or a nonstandard reading setup), consider confirming details with your eye care professional before ordering. That small check can prevent big frustration later.
7) You have a plan for safety and impact resistance
For everyday wear, sports, and kids’ glasses, many shoppers prioritize lenses that hold up well to bumps and drops. In the U.S., impact resistance is also a regulated topic for many lens types; the FDA’s requirements for impact-resistant lenses and related labeling appear in 21 CFR 801.410.
If you are replacing lenses for sports or outdoor use (ski and snow, cycling, running, or driving glare), consider whether you want a more impact-resistant lens material, whether you need polarization for glare, and whether you prefer a wrap-style fit. If you are unsure what is appropriate for your activities, getting guidance from an optician or optometrist is a smart move.
Rimless lens replacement: extra checks before you commit
Rimless frames can look minimal and feel lightweight, but the lenses do more “structural work” because they anchor the hardware. That means the frame can be eligible, yet still require a closer inspection than a typical full-rim replacement.
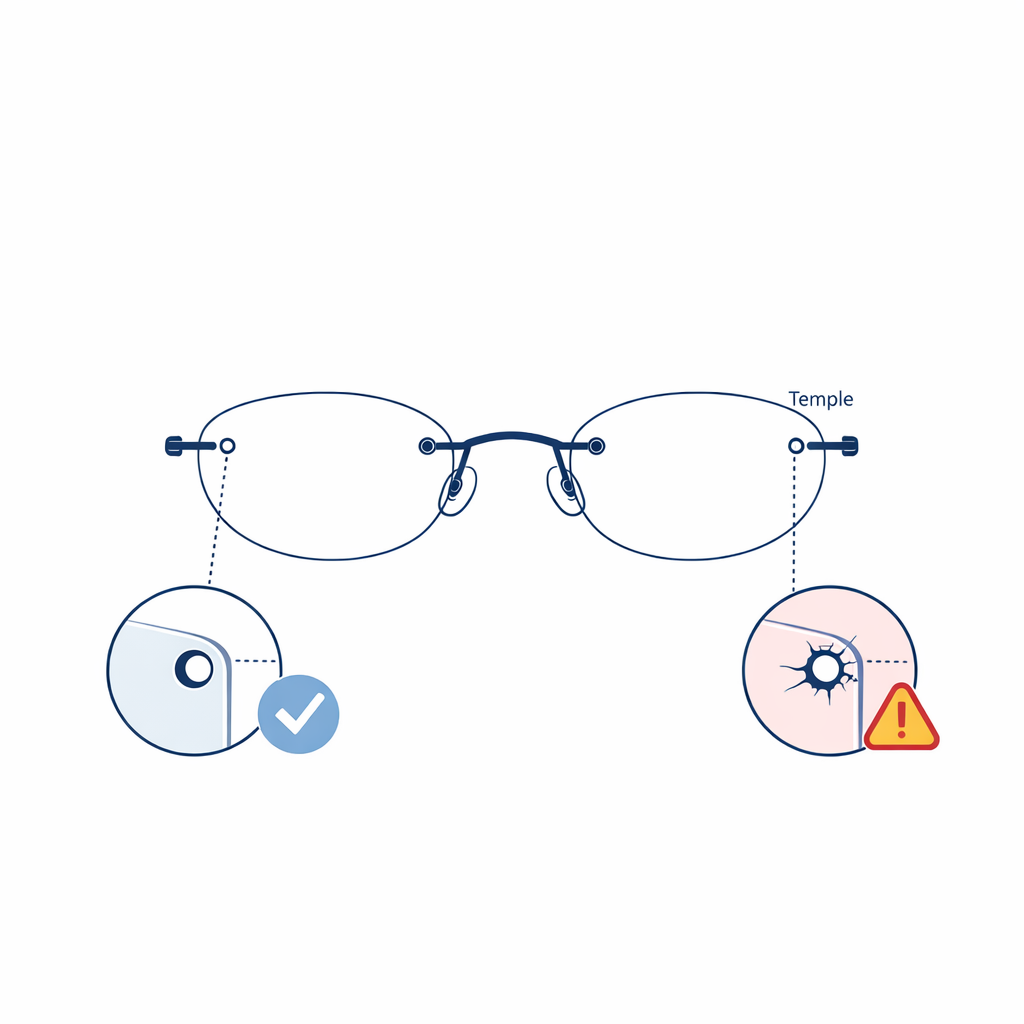
- Check the hardware: Screws, posts, and compression fittings should be present, not stripped, and not visibly corroded.
- Look for lens-edge chips near mount points: Small chips around holes can worsen during removal or reassembly.
- Confirm both sides match: If one lens looks like it was repaired or drilled differently, replacement may require extra care to match the mounting geometry.
- Be realistic about downtime: Rimless jobs can take longer if hardware needs replacement or if the frame requires careful handling.
If you rely on the rimless pair every day, consider ordering a backup pair first (or keeping your contacts ready) so you are not stuck without clear vision while the work is being done.
Semi-rimless lens replacement: what to check on the cord and groove
Semi-rimless frames are often very wearable and stylish, but their success depends on tension. If the cord or the groove that supports it is worn out, lenses may not stay seated the way they should.
- Inspect the cord: If it looks frayed, stretched, brittle, or discolored, expect it may need replacement.
- Check the groove area: If the lens edge looks like it has been slipping, the frame may need attention before new lenses go in.
- Look for bending at the rimline: If the frame front is bowed or twisted, it can change tension and fit.
Semi-rimless lens replacement is often a great choice when the cord is healthy and the frame front is stable. When the cord is failing, it can still be fixable, but it is better handled with realistic expectations about what parts may need service.
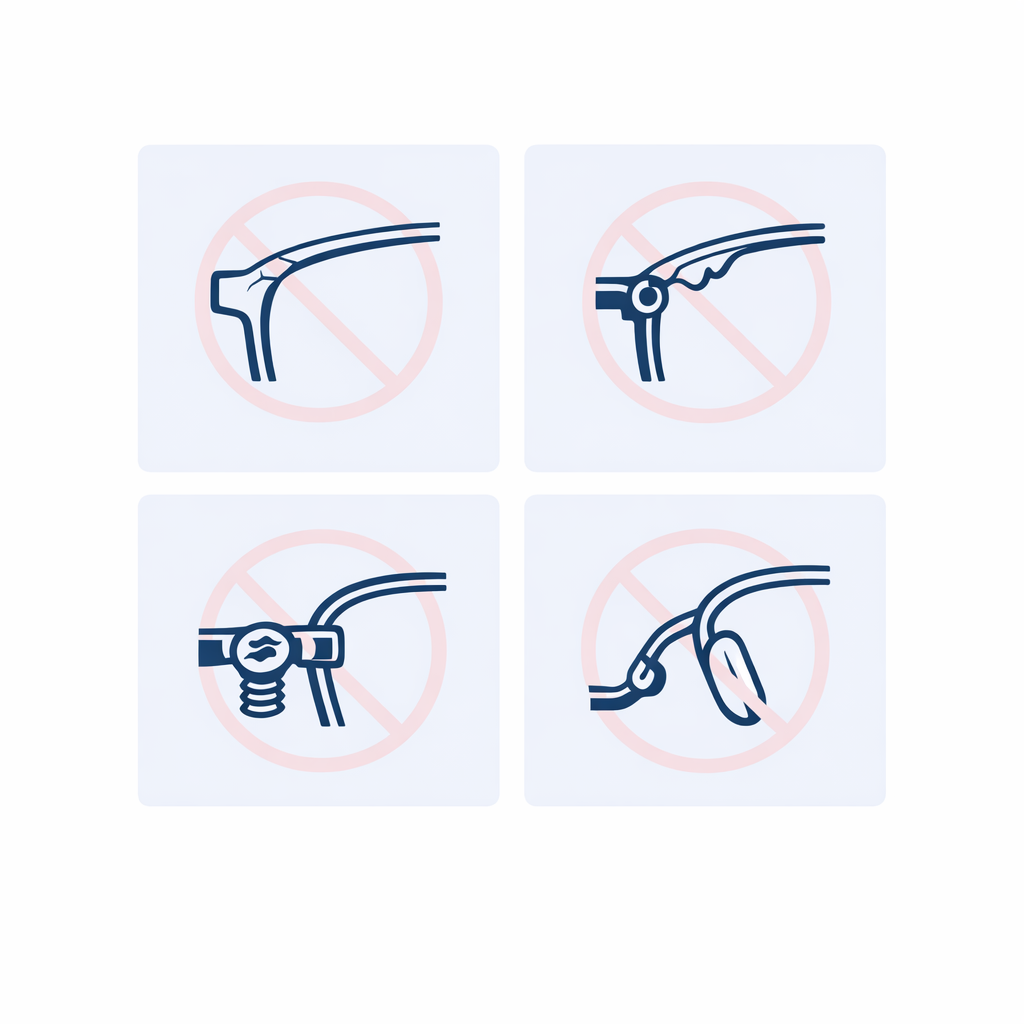
Damaged frames lens replacement: when to stop and choose a new frame
It is tempting to try to “save” a favorite pair, especially if the frame is discontinued. But some damage patterns can make lens replacement risky, even if the frame looks fine at first glance.
- Cracks at the eyewire: Tiny cracks can spread when old lenses are removed.
- Brittle plastic: Older plastic frames can become less flexible over time, increasing break risk during installation.
- Loose or stripped hinge screws: If the temples won’t hold alignment, the overall wearing experience can suffer even with perfect lenses.
- Broken nose pad arms on metal frames: If the pad cannot be secured, comfort and stability can be compromised.
If you see these issues, the most consumer-friendly plan is often: keep the frame as a keepsake or occasional backup, and get a new daily-wear frame that you can confidently maintain. If you are emotionally attached to the frame, consider bringing it to an optician for a hands-on opinion before investing in new lenses.
How lens replacement compatibility is evaluated (what the lab is really looking for)
When a lab evaluates your frame for replacement, they are thinking about one question: “Can we make a lens that fits securely without putting the frame at unreasonable risk?” This is why eligibility is not only about your prescription. It is about the mechanical relationship between lens and frame.
In practical terms, that evaluation usually includes the frame’s rigidity, symmetry, mounting style, and whether the lens shape can be reproduced accurately. If your frame is borderline, you may be offered options like changing lens material, simplifying lens features, or moving to a different frame to avoid a fragile setup.
Common mistakes and misconceptions (that cause most ordering headaches)
If you have ever searched “get new lenses in old frames” or “who will put prescription lenses in my frames,” you have probably seen a lot of conflicting advice. These are the most common misconceptions that lead to delays.
- “Any frame can take any lens.” Frame geometry, mounting style, and condition all affect what can be cut and installed reliably.
- “Rimless and semi-rimless are basically the same as full-rim.” They often need different edging and mounting steps, and they can be less forgiving when hardware is worn.
- “If my old lenses fit once, new ones will fit the same.” If the frame has warped over time, the lens opening may no longer match the original shape.
- “I can just move my old lenses into new frames.” Even when lenses and frames look similar, small variations in size and bevel shape can prevent a safe swap.
- “Replacing lenses is always cheaper than buying a new pair.” Sometimes it is, but specialty lenses, high prescriptions, or risky frame conditions can narrow the savings.
If you are trying to decide between “replace lenses in existing frames” versus starting over, the simplest way to avoid regret is to separate two questions: “Do I love this frame’s fit?” and “Is this frame healthy enough to hold new lenses?” You want both answers to be yes.
A practical decision guide: keep your frames or start fresh
Use this section if you are stuck between “new lenses for my frames” and buying a new frame outright. There is no single right answer, but there is usually a clear best answer for your situation.
Keeping your current frame is usually the better move if:
- Fit is excellent: You have finally found a bridge and temple fit that feels right all day.
- Style still feels like you: You want the same look, just clearer vision or a better lens upgrade.
- The frame is in good condition: No cracks, no warping, and hardware is stable.
- You want to upgrade lens performance: For example, adding anti-reflective coating or switching to polarized sun lenses for driving glare.
Starting with a new frame is usually the better move if:
- The frame is damaged or brittle: Especially around the lens edge or bridge.
- Comfort has been “okay at best”: New lenses will not fix a frame that pinches or slides.
- You want a different use-case: For example, turning everyday glasses into sports sunglasses might call for a purpose-built frame.
- You cannot be without glasses: If you have no backup, ordering a new pair first can reduce stress.
What to do next: a quick, no-drama ordering checklist

If you want the smoothest possible experience, do these steps in order. This reduces the odds of surprises, especially for rimless or semi-rimless jobs.
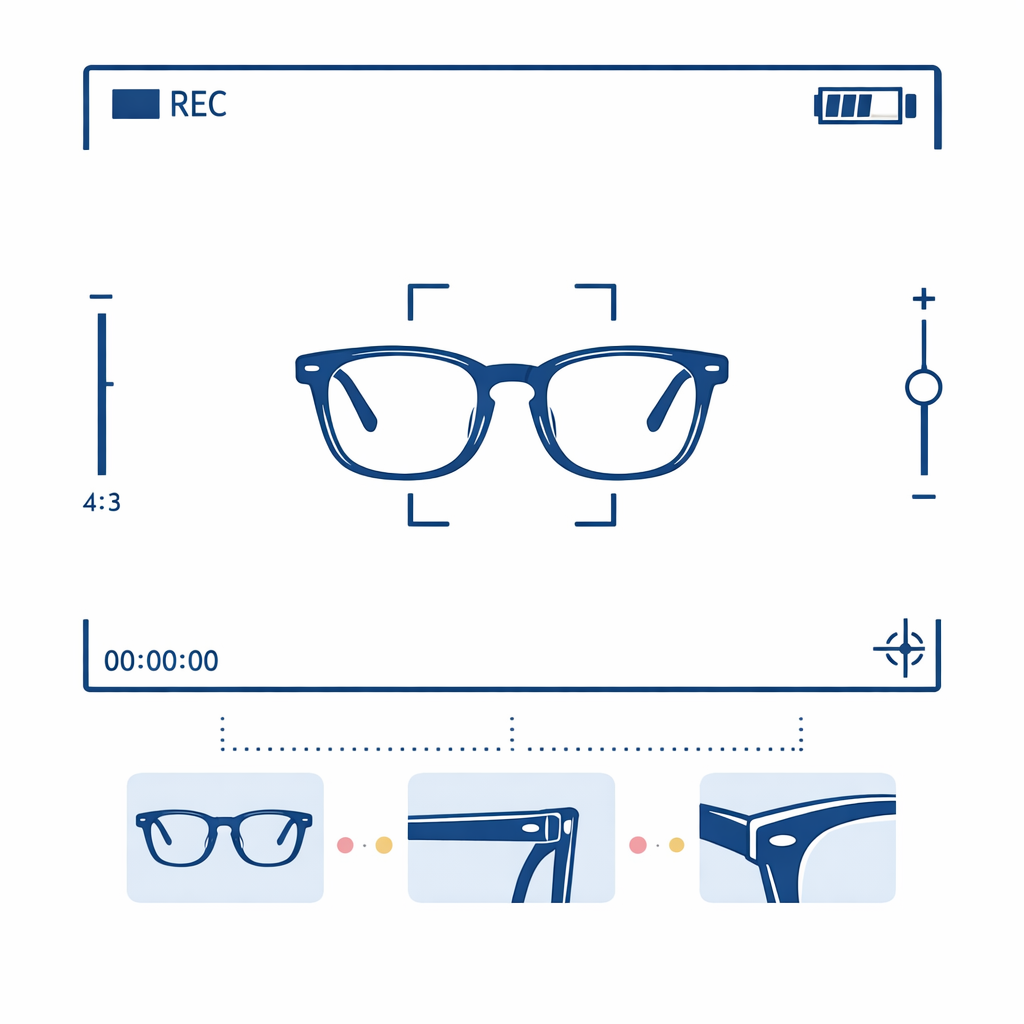
- Step 1: Clean and inspect your frame in bright light. Check the rim near the lenses, hinge stability, and bridge integrity.
- Step 2: Identify the frame type. Full-rim, semi-rimless, or rimless, and note any missing or worn parts.
- Step 3: Confirm you have your current prescription. If you need a copy, the federal Eyeglass Rule supports your ability to take your prescription with you.
- Step 4: Gather your PD and any special requirements. If you wear progressives, note that. If you have prism, double-check the numbers.
- Step 5: Decide on lens priorities. Daily screen use, night driving glare, outdoor sun, sports, or reading comfort.
- Step 6: If the frame is borderline, plan a backup. Keep contacts ready, use an older spare pair, or order a second pair so you are not stuck without vision.
- Step 7: Choose safety-aware options for your lifestyle. For sports or kids’ glasses, consider impact resistance and durability; the general regulatory framework for impact-resistant lenses is in 21 CFR 801.410.
Ready to refresh your vision with LensDirect
If your answers point to “yes, my frame is eligible,” you are in a great spot to move forward confidently. LensDirect can be a convenient place to start when you want to replace lenses in your own frames, restock contacts for travel, or build a dependable backup pair.
- Replace Your Lenses if you want new lenses in existing frames without changing your everyday fit.
- Shop Glasses if your frame looks borderline and you would rather start fresh.
- Shop Contacts if you are a contacts wearer who wants a reliable refill (and a backup plan while glasses are updated).
- Browse Best Sellers if you want to narrow choices quickly and avoid decision fatigue.
If you are still unsure which direction to go, keep it simple: protect your comfort first, then optimize your lenses. You can also Find Your Fit, Compare Options, or Learn More to choose a path that matches how you actually use your eyewear day to day.

Author
Subscribe to our email newsletter to get the latest posts delivered right to your email.